




Give it a brain

micro:bit name badge

Code a micro:bit so button A plays an animation and button B shows your name, then wear it as a badge.

  • About 45 minutes
  • 7 steps

One step at a time, in big writing.

The finished badge: a decorated card badge with a window in the front, and through it the micro:bit showing a heart on its lights, with its two buttons either side

Before you start

What you need

Tools

Materials

Make it

The steps

How it works

A micro:bit is a small computer with 25 lights and two buttons. It does nothing until you give it a program. You build the program from blocks in MakeCode and download it onto the micro:bit. A block such as on button A pressed waits for that button, then runs the blocks inside it from top to bottom.
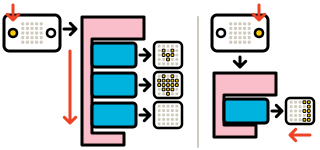
Two micro:bit programs side by side. On the left, button A is pressed and its block runs the three blocks inside it from top to bottom, showing a small heart, then a big heart, then clearing the lights; on the right, button B is pressed and its one block scrolls a name across the lights.

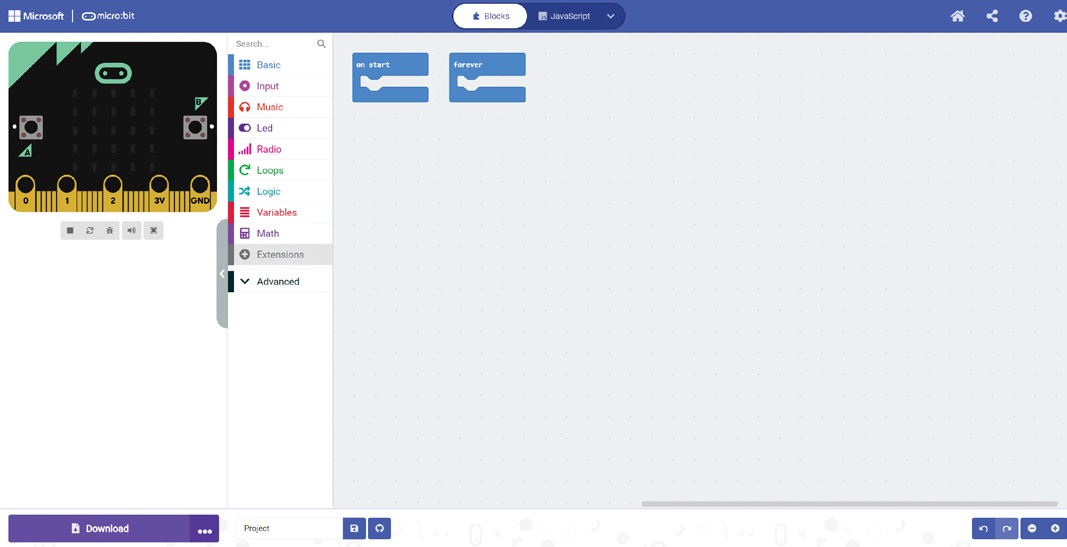
  1. The MakeCode editor: a micro:bit on the left, the block menus Basic, Input, Music, Led, Radio, Loops, Logic, Variables and Math in the middle, and the on start and forever blocks in the workspace

    Step 1: Start a project in MakeCode

    Go to makecode.microbit.org in Chrome or Edge. Click New Project, call it badge and click Create. Plug the micro:bit into the computer. Click the three dots next to Download, then Connect device, and follow the steps on screen.
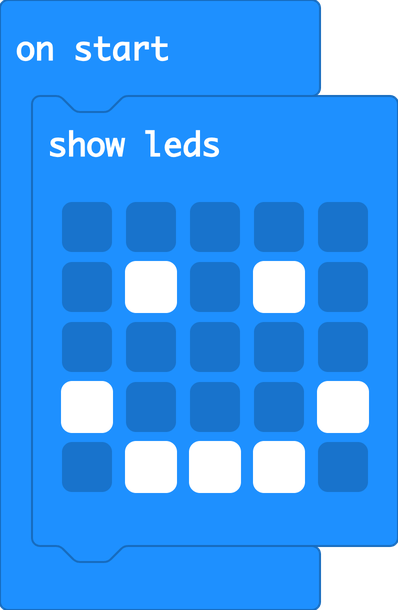
  2. The blocks: on start, holding a show leds block with a smiling face drawn in the squares

    Step 2: Draw a picture

    From Basic, drag show leds into on start. Click the squares to draw a picture. Click Download. Does your picture appear on the micro:bit?
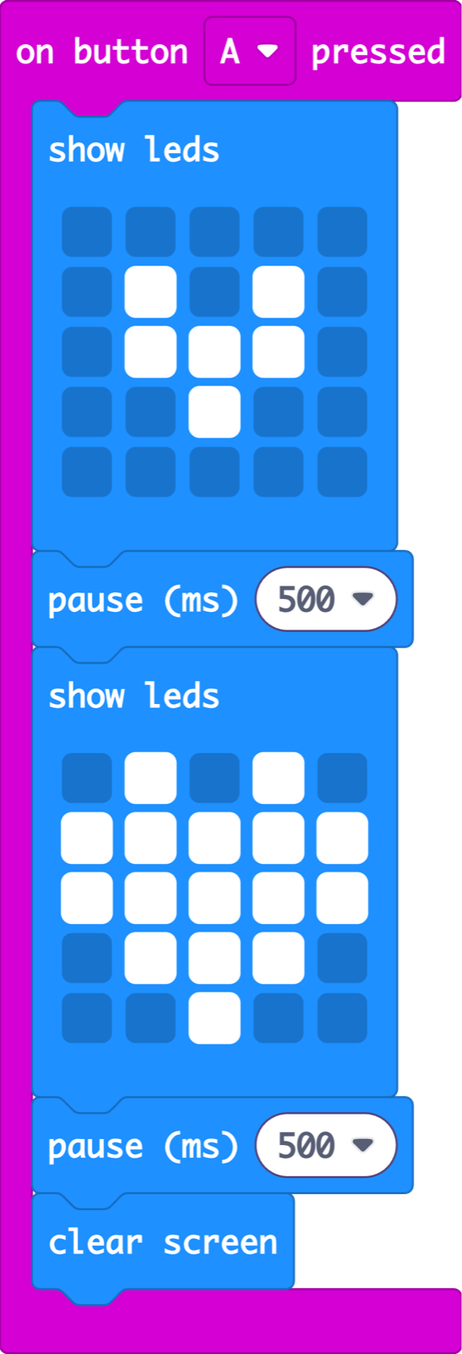
  3. The blocks: on button A pressed, holding a show leds with a small heart, a pause of 500, a show leds with a big heart, a pause of 500, then clear screen

    Step 3: Make an animation on button A

    From Input, drag in on button A pressed. Inside it, put two show leds, each followed by a pause of 500, and draw a different picture in each. End with clear screen (under Basic, then more). Download and press A. Does your animation play?
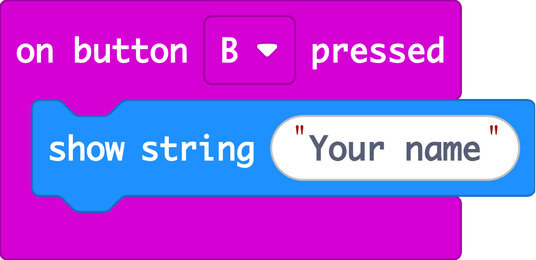
  4. The blocks: on button B pressed, holding show string with the words Your name

    Step 4: Show your name on button B

    Drag in another on button A pressed and click the A to change it to B. Put show string from Basic inside it and type your first name. Download and press B. Does your name scroll across?
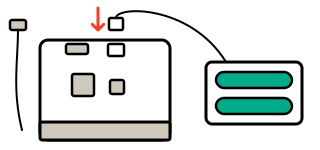
  5. The back of a micro:bit with the USB cable unplugged beside it, and the white plug of a battery pack for 2 AAA batteries being pushed into the small white socket next to the USB socket

    Step 5: Put your micro:bit on batteries

    Put the batteries in the pack, matching the + and − marks. Unplug the USB cable. Push the white plug into the small white socket on the back, and switch the pack on if it has a switch. Press A, then B. Does your badge work without the computer?
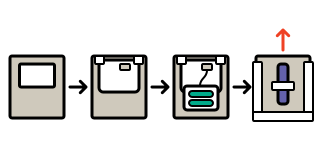
  6. Making the badge in four steps: a piece of card with a window a little smaller than the micro:bit, the micro:bit laid face down over the window and taped at its top corners, the battery pack on its back, then a second card on top taped down both sides and along the bottom, with a clothes peg taped to the back and the top left open.

    Step 6: Make a badge to hold it

    Cut a window in one card, about 4.5cm wide and 3cm tall, so you can see the lights and press A and B. Decorate around it. Tape the micro:bit face down over the window at its top corners. Put the battery pack behind it and the second card on top. Tape the cards together down both sides and the bottom, leaving the top open for the batteries. Tape a peg or pin to the back.
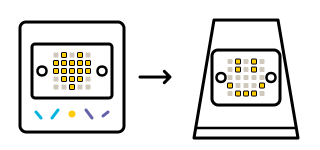
  7. The micro:bit taken out of its card badge and fixed to the front of an upside-down paper cup robot, where its lights show a smiling face

    Step 7: Invent your own

    Give your badge new tricks, or move your micro:bit onto your robot. What will your robot show when someone presses A?

After the steps

Use it on your robot

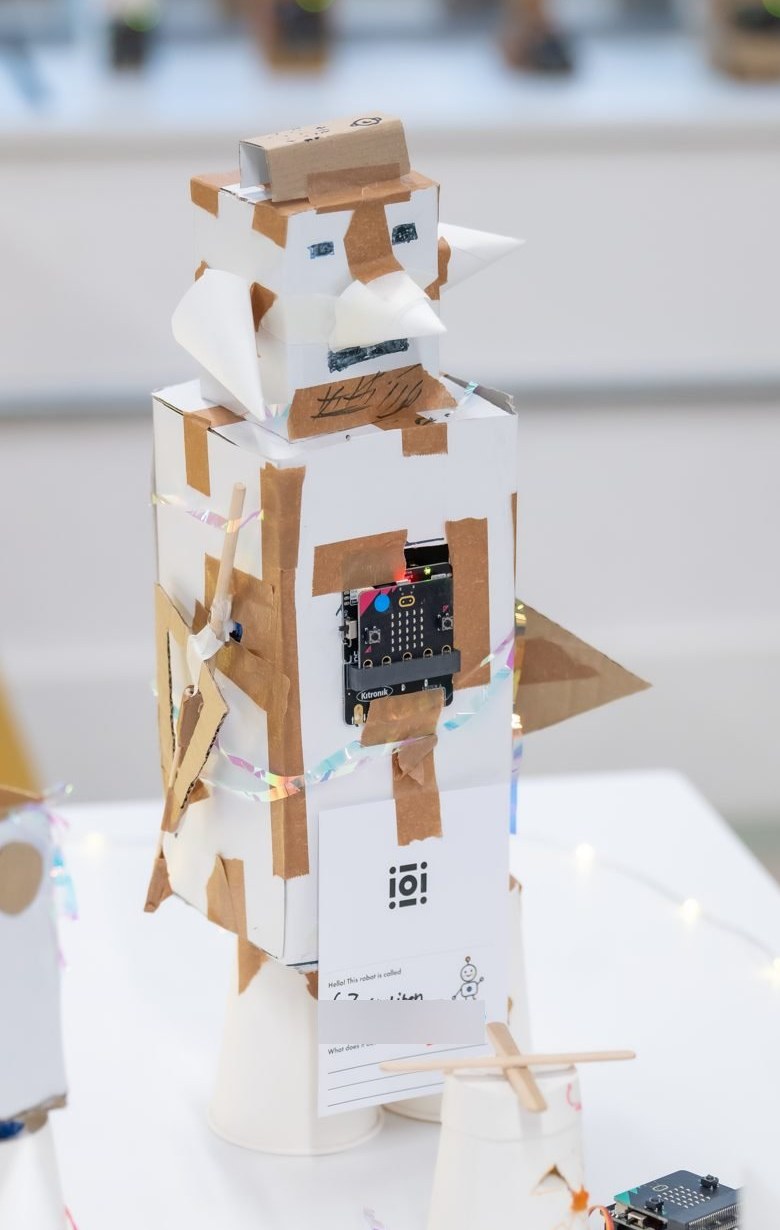
Fix your micro:bit to your robot's head as its face. Make it smile on A and say its name on B.

Your turn

Ideas to try

Make something else

  • A robot facethat blinks on A and says hello on B.
  • A pet badgewith a cat that blinks on A and wags its tail on B.
  • A rocket badgecounting down 3, 2, 1, then blasting off.

Then change something

  1. Change every pause to 200. What happens?
  2. Drag in on shake from Input, with two show leds inside. What happens when you shake your badge?
  3. Change a button block to A+B. What does your badge show when you press both buttons?
  4. Add two more show leds. Can you make a picture move across?

iOi challenge

Make a robot face with three moods, using only two buttons.

More to make