





Give it a brain

Paper circuit robot with two LED eyes

Wire two LED eyes on a flat card, with a binder clip for a switch. Then fold the card so your robot stands up, eyes shining.

  • About an hour
  • 7 steps

One step at a time, in big writing.

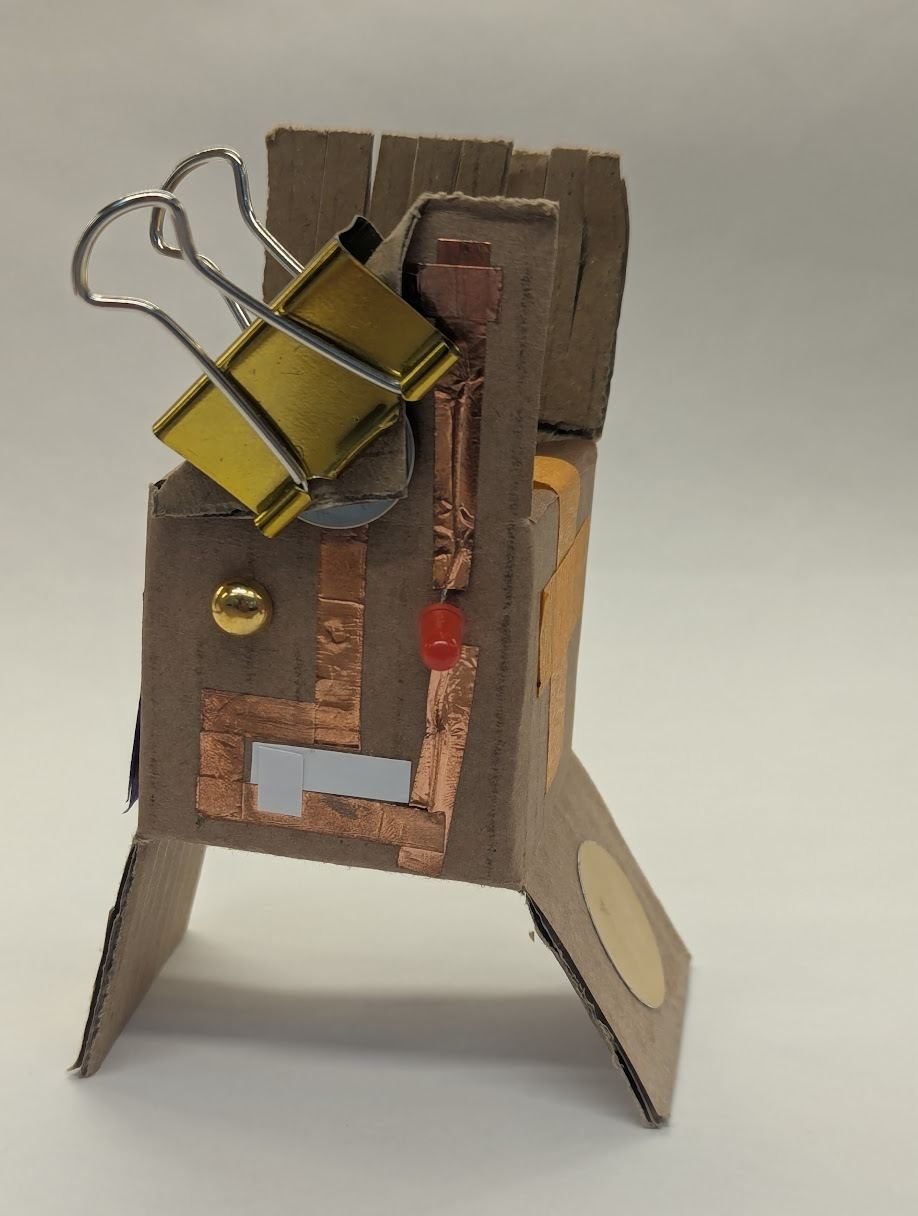
A small cardboard robot standing on folded legs, with a fringe for hair, copper tape tracks on its front, a red LED and a binder clip holding the battery at the top

Before you start

What you need

Materials

Make it

The steps

Build the whole circuit while the card is flat. Fold it into a robot at the end.

How it works

Electricity flows from the battery along the + strip, through both LEDs and back along the − strip. Each LED bridges the two strips on its own, so the two eyes share the battery. This is called parallel. The binder clip is the switch: it presses the flap onto the battery to close the gap, and taking it off opens the gap again.
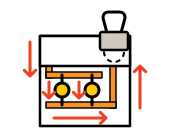

The front of the finished circuit with the flap clipped shut and both LED eyes lit. Red arrows show the electricity going from the battery down the plus strip, through each LED, along the minus strip and back up to the battery.

  1. An LED lighting up with a coin cell battery between its legs: the long leg on the plus side, the side with the writing, and the short leg behind on the minus side

    Step 1: Test both LEDs on the battery

    Slide each LED's legs either side of the battery: the long leg on the + side, the side with the writing. Do both light?
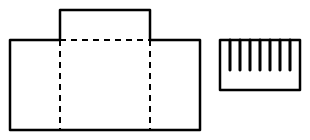
  2. The robot card laid flat: a front panel in the middle, a side flap on each side for the legs, and a short flap on top for the switch, with dashed fold lines between them. Beside it, a strip of card snipped into a fringe for the hair.

    Step 2: Cut and fold the robot card

    Draw the shape on your card: a front panel 9cm square, a side flap 5cm wide on each side, and a flap 3cm tall on top. Cut it out. Fold along the three lines with a ruler, then open it flat again. Snip the small strip into a fringe for the hair.
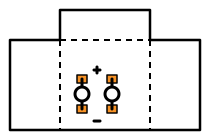
  3. The flat robot card with two LEDs side by side on the front panel. Each LED has its long leg bent up onto a small copper square and its short leg bent down onto another; plus is marked above the eyes and minus below.

    Step 3: Stick on two LED eyes

    Stick four small squares of copper tape on the front panel, two for each eye, about 1cm apart, one above the other. Bend each LED's legs flat, once only: long leg up, short leg down. Sit each leg on a square. Write + above the eyes and − below them in pencil.
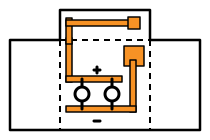
  4. The copper strips on the robot card. The plus strip runs along the top of both eyes, up the side and across the fold onto the top flap, ending in a small square. The minus strip runs along the bottom of both eyes and up to a bigger square for the battery. The two strips never touch, and each corner is a new overlapping piece.

    Step 4: Lay the two copper strips

    Lay the + strip over both top squares, then up the side, across the fold and along the top flap. End it in a small square that lands in the middle of the battery square when you fold the flap. Lay the − strip over both bottom squares and up to a square about 2cm across, near the top, for the battery. Start a new piece at every corner and every fold, overlapping the last one.
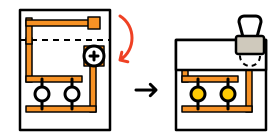
  5. The front of the robot card, twice: first the coin cell battery on its copper square, plus side up, with the top flap folding down over it; then the flap folded down onto the battery, held with a binder clip, and both LED eyes lit.

    Step 5: Clip the battery switch

    Put the battery on its square, + side up. Fold the top flap down onto it and press. Do both eyes light? Clip the flap shut with the binder clip. Take the clip off to switch off.
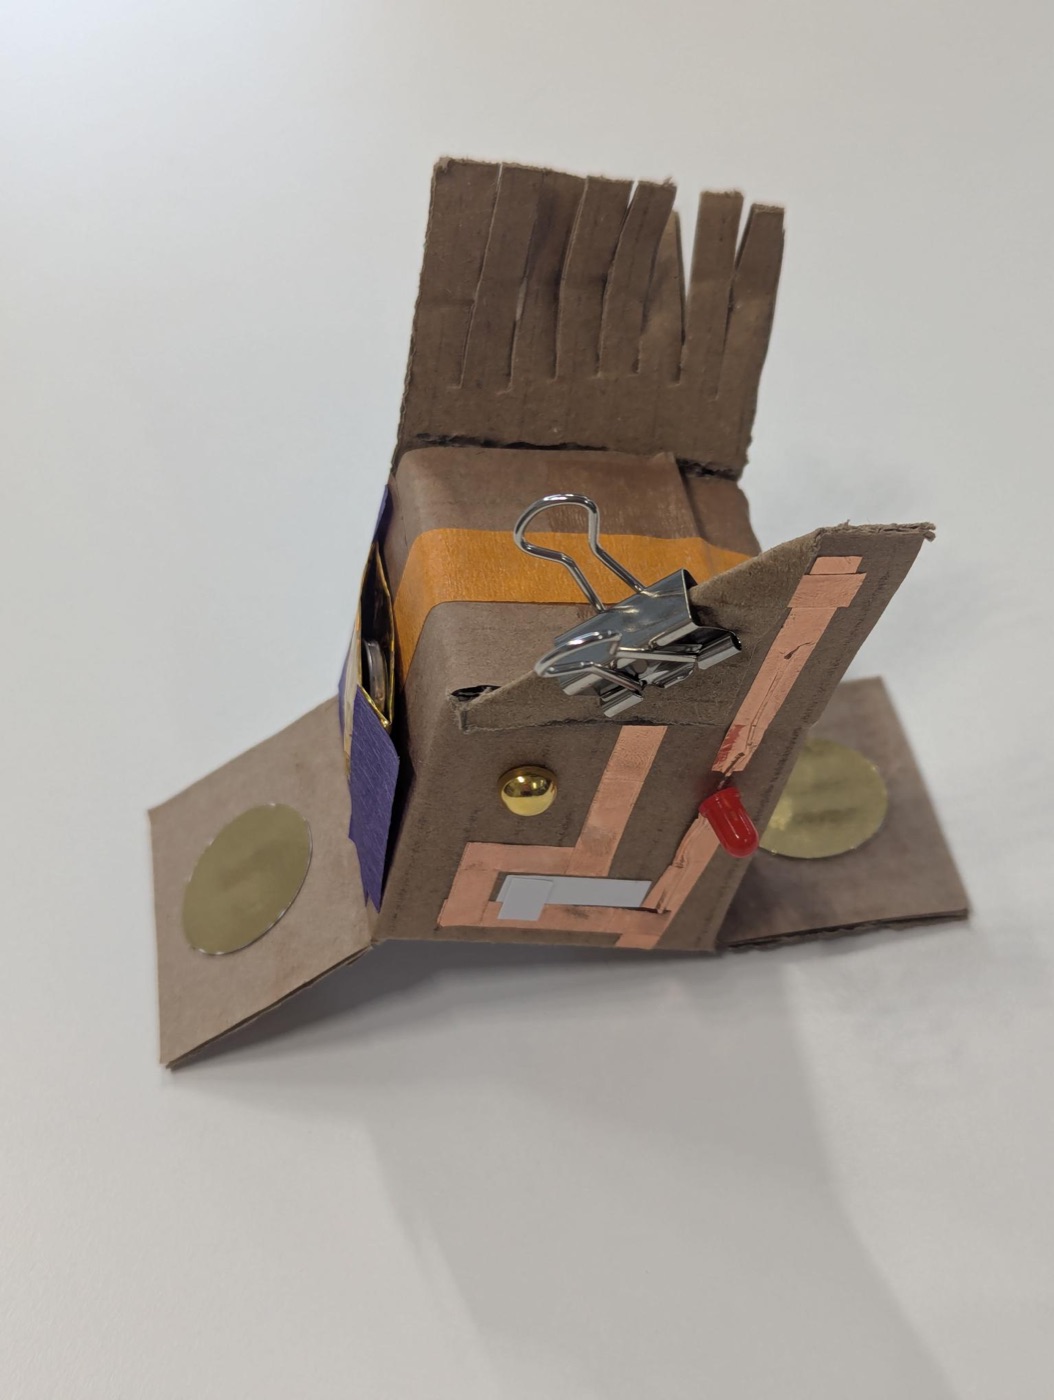
  6. A small card robot from above, with a fringe of hair behind, side flaps folded back and opened out as legs, copper tape on its front, a red LED and a binder clip on the battery

    Step 6: Fold your robot so it stands

    Tape the fringe behind the top of the front panel with brown paper tape, so it sticks up. Fold both side flaps back and open them out like legs. Stand your robot on the bottom edges of its legs. Does it stand on its own?
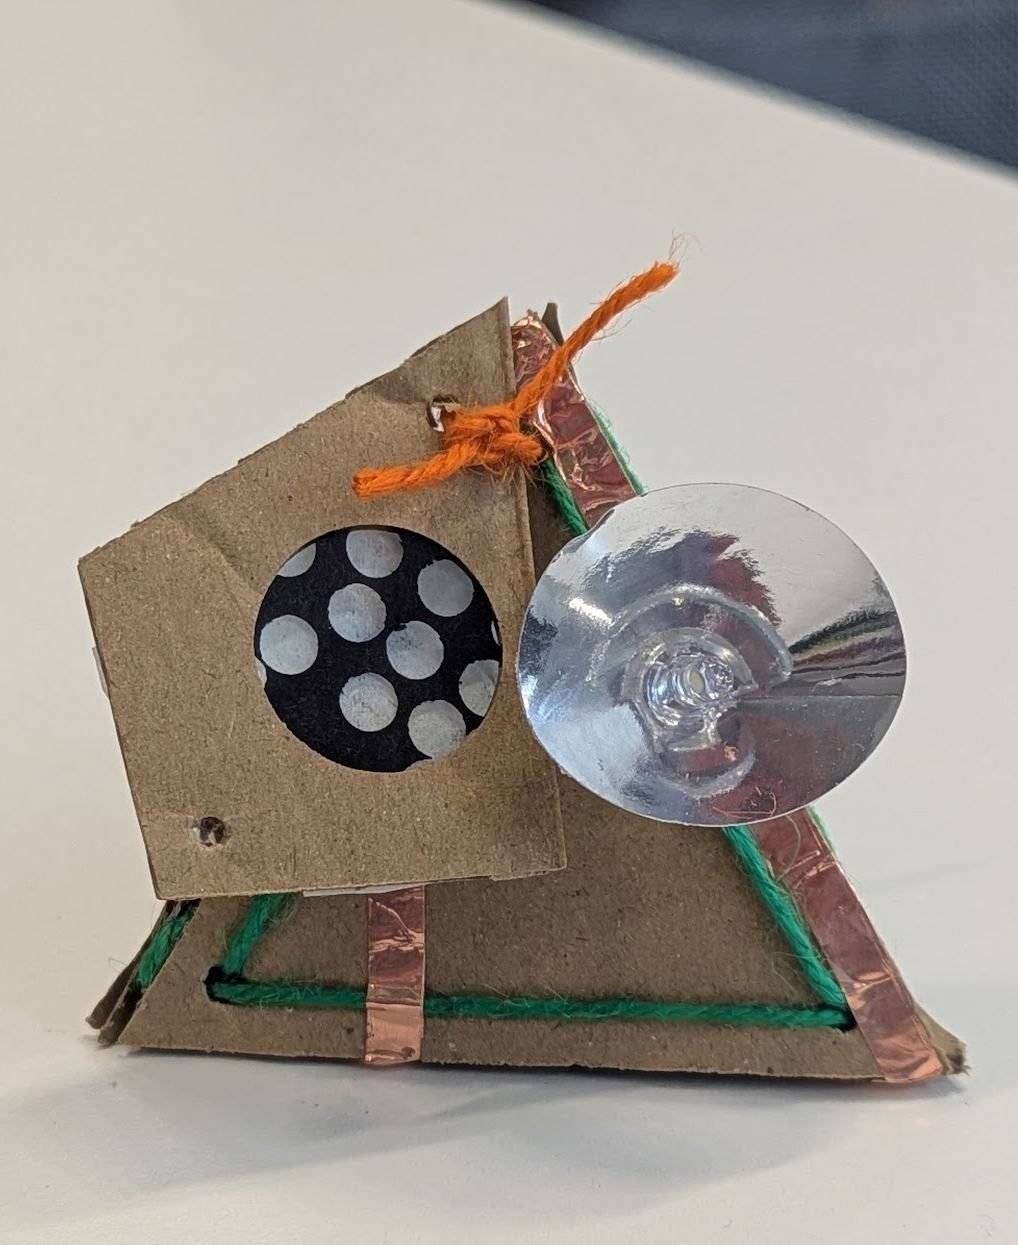
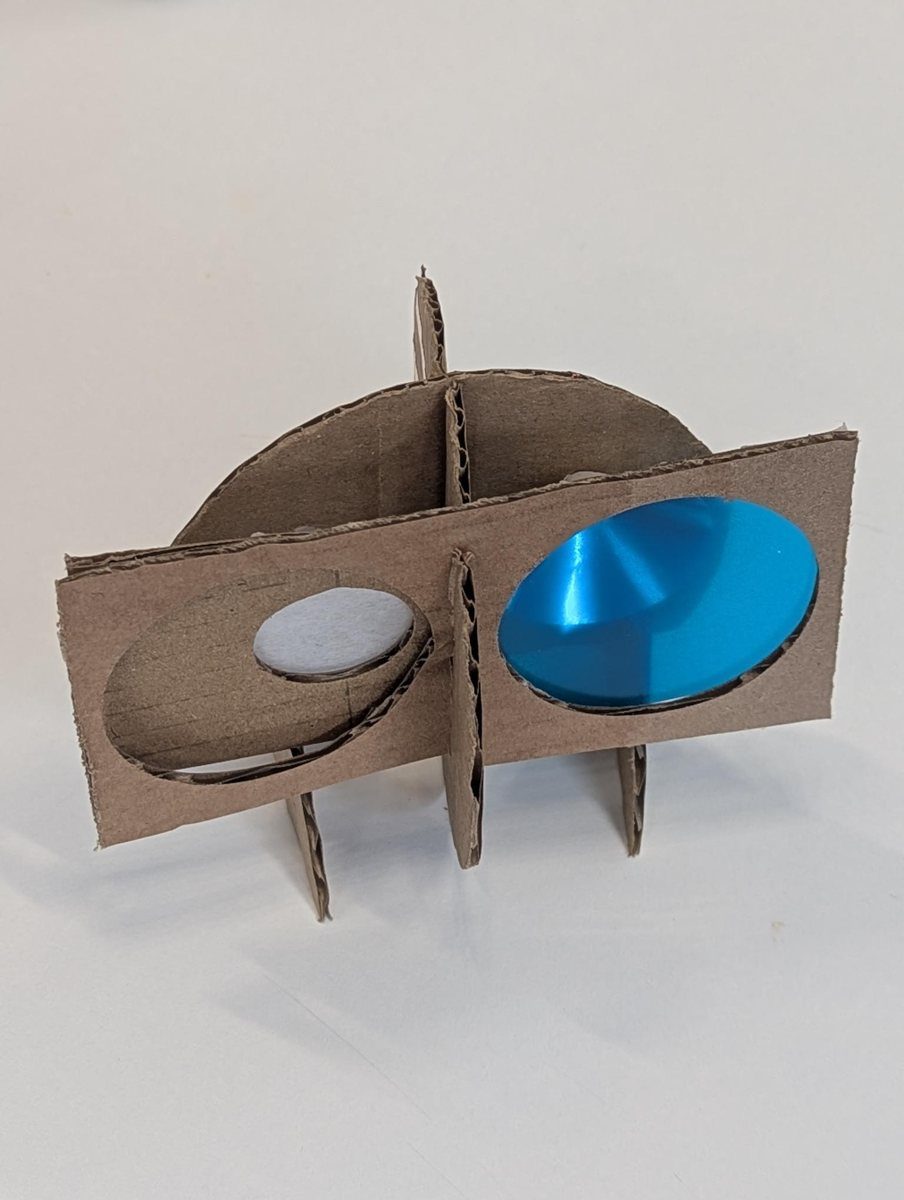
  7. A robot made from a folded cardboard triangle, with copper tape along one edge, a spotty disc and a shiny clear disc for eyes

    Step 7: Invent your own

    Fold a robot in your own shape. Where will its lights go, and how will it stand?

After the steps

Use it on your robot

Your folded robot can be the head of a bigger robot: tape it on top of a box body, and its eyes light up when you clip the switch.

For ideas
Your turn

Ideas to try

Make something else

  • A robot petwith pointy ears in its fringe and a tail on the back.
  • A robot with a glowing heartand two eyes, three LEDs in all.
  • A tall lookout robotwith long legs and its eyes at the very top.

Then change something

  1. Add a third LED between the strips, long leg on the + strip. Do all three light?
  2. Swap one eye for a blue LED. Are both eyes still as bright?
  3. Make the legs shorter, then longer. Which robot stands best?
  4. Take the clip off and hold the flap with masking tape. Which switch is easier to use?

iOi challenge

Make a robot that stands on its own and keeps both eyes lit while you carry it across the room.

More to make

  • Build a body

    Kinetic shapes

    Pin card strip arms to the sides of your robot, and it can wave while its eyes shine.
    • About 40 minutes
  • Build a body

    Make it roll!

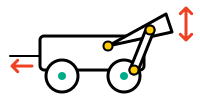
    Tape your standing robot on top of a box with wheels, and it rides along with its eyes lit.

    • About 40 minutes